November 11, 2019
Everyone knows the importance of cleaning high-touch surfaces in facilities—such as handles, switches, and counters—as well as floors, and restrooms. One item commonly found in business and residential facilities is often overlooked at cleaning time—plants.
Plants not only beautify a building they enhance its oxygen. Through the process of photosynthesis, plants use sunlight to create their food from carbon dioxide and water, generating oxygen as a byproduct of the process. However, dusty, dirty, and grimy leaves on the plants impedes the process.
Fortunately there are easier ways to clean plants than wiping each leaf with a cloth, advises Inhabitat. You can move small plants into the sink to rinse them off with the spray nozzle. Allow them to drain and dry off the pots before putting them back. You also can take them outside and spray them lightly with a garden hose, allowing them to dry before bringing them back inside.
For larger plants that can’t be moved easily, use a spray bottle to wash off the leaves.
In between showers, use a feather duster, lightly moving over the surfaces of the plant, weaving between branches to touch the top and bottom of leaves. Use a gentle touch so you don’t disrupt blooms or knock healthy leaves off the plant.
 Leave a Comment » |
  Uncategorized |
  Permalink
 Posted by Alex
February 26, 2013
Construction crews can leave a huge mess behind once home building or remodeling is complete. It is overwhelming for a homeowner to have to deal with such a colossal mess on his own.
- Remove trash. Remove labels and stickers. Remove painter’s tape and masking tape as needed. Clean and polish glass. Vacuum heating, ventilation and air conditioning vents. Wipe down vent grilles. Wipe down baseboards, chair rails, crown molding and door trim. Wipe down window trim and clean sills. Wipe off door hardware. Clean light fixtures and install bulbs. Vacuum carpeting. Dry mop wood floors. Wet mop tile and concrete floors.
Bathrooms
- Remove trash. Remove labels and stickers from fixtures. Clean and polish faucets. Clean counter tops and back splash. Polish mirror. Wipe down cabinet fronts. Clean and polish shower tile and surfaces. Polish shower faucets, shower heads and drain. Clean and polish tub and tub surround. Polish tub faucets and drain. Wipe off towel racks, bars and rings. Clean toilet, urinal and any other fixtures. Clean inside cabinet and vanity drawers. Clean inside vanity shelves and spaces behind doors. Clean any tile work on walls or around windows and doors.
Kitchens
- Remove trash. Clean sinks and polish faucets. Wipe down cabinet fronts and exposed sides. Remove any items in cabinet drawers and place on the counter top. Clean insides of cabinets and drawers. Clean cabinet shelves. Clean and polish counter tops. Remove tags and labels from the appliances and sinks. Clean and polish appliances. Clean under sinks.
Utility/Basement/Garage
- Remove trash. Vacuum furnace surfaces, hot water heater and washing machine and dryer connection points. Clean stairs and landings, and wipe down balusters and handrails. Wipe off tops, sides and bottoms of exposed duct work. Wipe off door hardware.

1 Comment | Uncategorized | Tagged: bathtub, cleaning, construction, doors, faucets, fixtures, handrails, shower heads, siinks, stairs, trash | Permalink
Posted by isabellencm
February 20, 2013
When mold and mildew begin to grow on caulking, it’s a problem that is difficult to reverse. In most cases, it requires removal and replacement of the caulking. If the mold case is mild, you may be able to kill it off with a few simple steps. Here’s what to do.

- Fill a bucket with warm water.
- Add a small amount of soap and mix until suds begin to form.
- Wash all of the caulking with the soapy water and a soft cloth.
- Fill a spray bottle with undiluted bleach.
- Spray the caulking generously with the bleach. Be sure to remove any colored items, such as bath rugs, that could become discolored – don’t forget to wear clothes you don’t care about.
- Allow the bleach to sit on the caulking for 10-15 minutes. During this time, the bleach will kill the mold spores and begin to whiten the discoloration.
- Use a scrub brush to brush along the surface of the caulking, moving from side to side. Apply light pressure or it may damage the caulking.
- Rinse completely with water and/or scrub the surface again with the soapy water used earlier to remove any bleach residue.
- Dry the caulking with a soft towel.
- Repeat if necessary.
Leave a Comment » | Uncategorized | Tagged: bathroom, bleach, caulking, cleaning, mildew, mold, mold spores | Permalink
Posted by isabellencm
February 15, 2013
We’ve all heard that being active helps to improve our health, quality of life and the bonds between people. So there’s no better day to foster increased activity than on Family Day.
Head to your local recreation center as they have lots of unique programming for the whole family. Take a look at their schedule prior to going to save time and plan accordingly.
Hibernating indoors during the winter months might feel like the natural thing to do, but getting outside and exercising benefits the whole family by improving levels of vitamin D in the body, improving concentration, and bringing families closer together.
So turn Family Day into Family Activity Day. Here are some fun things you can think about trying:
Sledding
Skiing
Skating
Snowshoeing
Go for a walk and discover the wonder of nature
Try snowball bowling
Set up a cold obstacle course
HAVE FUN!!!

Leave a Comment » | Uncategorized | Tagged: Family day, fun, health, skating, skiing, sledding, snowshoeing | Permalink
Posted by isabellencm
February 12, 2013
To bring a shine back to your stove’s exhaust fan and hood, first turn off the power to the appliance. Here are some tips for cleaning the grease filter:
- Soak filter in a degreaser, rinse then toss it in the dishwasher. If it’s stainless steel, you should be able to use regular detergent no problem.
- If it’s aluminum, be aware that the detergent can cause discoloration or pitting. You can try running it through a cycle without it. I personally don’t worry about it, but it’s something you should be aware of.
- Another option you might like to try is taking it to the car wash and using the power spray hose with hot water to hose it down.
- If they’re charcoal filters, just replace when needed.
For both inside and outside the hood, apply degreaser to a damp cloth and wipe down. Make sure not to spray any directly on the appliance since you could accidentally spray some into the exhaust fan motor or light fixture.
If the buildup inside the hood is especially thick, first make a thick paste of baking soda and water. Take a cloth wet with hot, soapy water and then scrub with the paste in a circular motion–wipe off as much as the grease as you can then rinse the cloth in a bucket of hot, soapy water. Reapply baking soda paste on the cloth and repeat as needed.
Once the majority of buildup has been removed–wash the unit with hot, soapy water to remove all traces of the baking soda paste and then wipe with degreaser if needed.

Leave a Comment » | Uncategorized | Tagged: baking soda, cleaning, degreaser, exhaust fan, grease filter, Range hood, stove | Permalink
Posted by isabellencm
February 7, 2013
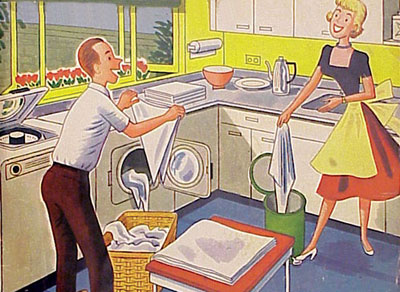
One thing that newlyweds can frequently argue about are household chores and cleaning duties. At least that seems to be a topic of occasional disagreement in our household.
Make a list of all of the household chores that need to be done. Besides basic cooking and cleaning, remember to include grocery shopping, laundry, meal planning, taking out the trash and mowing the lawn.
If you want to share chores, than it’s important that you both have an equal amount.. And that not one of you is doing harder chores than the other. It wouldn’t be fair if one of you only has to dust off the tables while the other has to do the dishes, laundry and than go out to mow the lawn. If you aren’t fair about who does what, than it could cause problems.
If you do that certain chore differently than they do but they still get it done, than it’s okay. Just let them do their chores without interrupting them. And don’t hassle them to do their chore, maybe they’ve just been a little busy and they’ll get to it. If it’s been a few days and it hasn’t been done yet, than you can say something to them.
3 Comments | Uncategorized | Tagged: chores, cleaning, cooking, duties, household, laundry, mowing, newlyweds, planning, shopping | Permalink
Posted by isabellencm
February 4, 2013
Green Cleaning can have different interpretations. It may refer to the ways as to how you will clean your home, it may also refer to the materials you will have to get rid of your home without getting the risk of exposure to indoor pollution. The main concept is to use cleaning materials and solutions that will reduce the negative impacts on the environment and the people as well.
Using natural cleaning materials can be old school but it will surely keep you and your family from being exposed to life-threatening indoor pollutants. Keep away those air fresheners and sprays and start having a healthy environment by using green cleaning products.
Some tips to help you out:
- You may use baking soda and vinegar to clean pipes, stains, and drains.
- Use vinegar to clean the toilet. Pour one cup of vinegar in the toilet and let it stay for at least 30 minutes. After the specified period pour in ½ cup of baking soda. You may remove the stains by using a toilet brush.
- To remove the stinky smell of your refrigerator, you may put charcoal in a cup and put it inside the fridge over night. In the morning, get rid of rancid foods and remove the stains using baking soda and vinegar.
- You may use lemon rind as air freshener.
- And you can also show your creativity through a home-made potpourri using dried lemons and oranges.

Leave a Comment » | Uncategorized | Tagged: baking soda, cleaning, dried oranges, fridge, Green cleaning, healthy, lemon, pollution, Stains, toilet, vinegar | Permalink
Posted by isabellencm
February 1, 2013
If your washing machine smells and is dirty, this is one of the less obvious culprits. It requires a tad bit more work than throwing some bleach or washing machine cleaner into the clean cycle, but it can effectively eliminate the “gunk” at the root cause of the stench.
Typically, your washing machine’s instruction manual will tell you how, and how often, to clean under the agitator or the drain pump filter. Top and front loaders are different in the way they operate and drain, so there are different methods for both.
For a top loader, you’ll need to remove the agitator to get to the “gunk.” Usually, there is a top that can be popped off to expose a bolt in the agitator. Removing the bolt allows the agitator to be lifted up out of the washer. Once removed, clean in, under and around the agitator with a hot water and bleach solution.
A front loader washer does not always drain completely so they typically have a panel on the bottom, either exposed or hidden, that contains the drain pump filter. Removing the panel will expose a drain. Make sure you have a bucket and a towel handy as some water will come out when the drain is released. Once the water is drained, the filter can be removed and the “gunk” cleaned out. Most manufacturers recommend cleaning the filter once a month.

1 Comment | Uncategorized | Tagged: bleach, cleaning, dirt, drain, drain pipe, filter, smell, washing machine | Permalink
Posted by isabellencm
January 29, 2013
The first assumption coming to mind is that it should be killing all kind of germs on the area that you have been using it. But is that really true? If you had read carefully the labels of such antibacterial cleaners, you should have seen that they are not killing the bacteria causing the common flu. In addition to that, you should know that most of these cleaners work when sprayed and left on the desired area for at least a minute before being wiped down. This is a more sure way that they will work in full effect and kill all of the bacteria. Don’t you ever make the mistake to spray and immediately wipe off the cleaner.
Antibacterial cleaning products are good for the home because they keep you protected from the germs and bacteria that find their way into the house through children and pets.
Antibacterial cleaning products are also good for the office, because when you’re at work, you put yourself at risk of coming into contact with all the potential contaminants that your co-workers do.
Another reason why antibacterial cleaning products are good to have around is that they offer a pleasing scent and a sanitary feel to any environment that they are in. When you feel like your home or workstation is clean, you simply feel better and are more productive. These products set a tone of cleanliness around the home that can be infectious, in a good way.
Leave a Comment » | Uncategorized | Tagged: antibacterial, bacteria, cleaning, contaminants, germs, home, office, products, sanitary, sanitize, soap | Permalink
Posted by isabellencm


